This post may contain affiliates. This means I may make a small commission off one of the links that you click which I use to run this blog :)
My house needs some greenery ASAP! It’s boring and it just… needs some life, you know? These DIY Concrete Planters are SO simple and easy to do! You should make a few and add them to your home decor or give them as gifts to your family and friends!
I know do it yourself can be messy and sometimes complicated. Truth be told, not every project is a home run out of the park for me either but I’m gonna be real with you. I’m a fan of all things DIY.
Even though I don’t get to do it as often as I would like, everything that I create, I create (at least the cute stuff that I didn’t mess up 😅). I love that I can look around my home and see things that I’ve done with my own two hands.
Talk about a fun and unique way to give yourself some really cool home decor, right?
If you’re looking for a fun project that won’t break the bank, these DIY concrete planters are awesome. Keep for you or gift to someone you love but just know that the outcome is truly spectacular!
Simple and Easy DIY Concrete Planters

Supplies:
- Cement and sand mixture (50:50)
- 2 Leftover cardstock boxes
- Plastic bucket
- Stick
- Scissors
- Adhesive tape
- Paint
- Brush
Directions:
You can create your own custom sized containers or you can also use leftover cardstock containers, such as milk cartons, medicine syrup cartons etc. as the primary and secondary containers.
Select 2 containers, a big one for the outer molding and a small one for the inner molding. Select your containers. Decide the height of the primary container; measure the height from its bottom and cut it to the marked height. The secondary container should be longer than the primary one so we’ll leave it the way it is.

Use adhesive tape to wrap the outer side of the primary container to make sure no leakage happens after pouring cement mixture into it.

In plastic bucket or pot add the cement and sand mixture. The proportion of cement and sand should be 50:50.
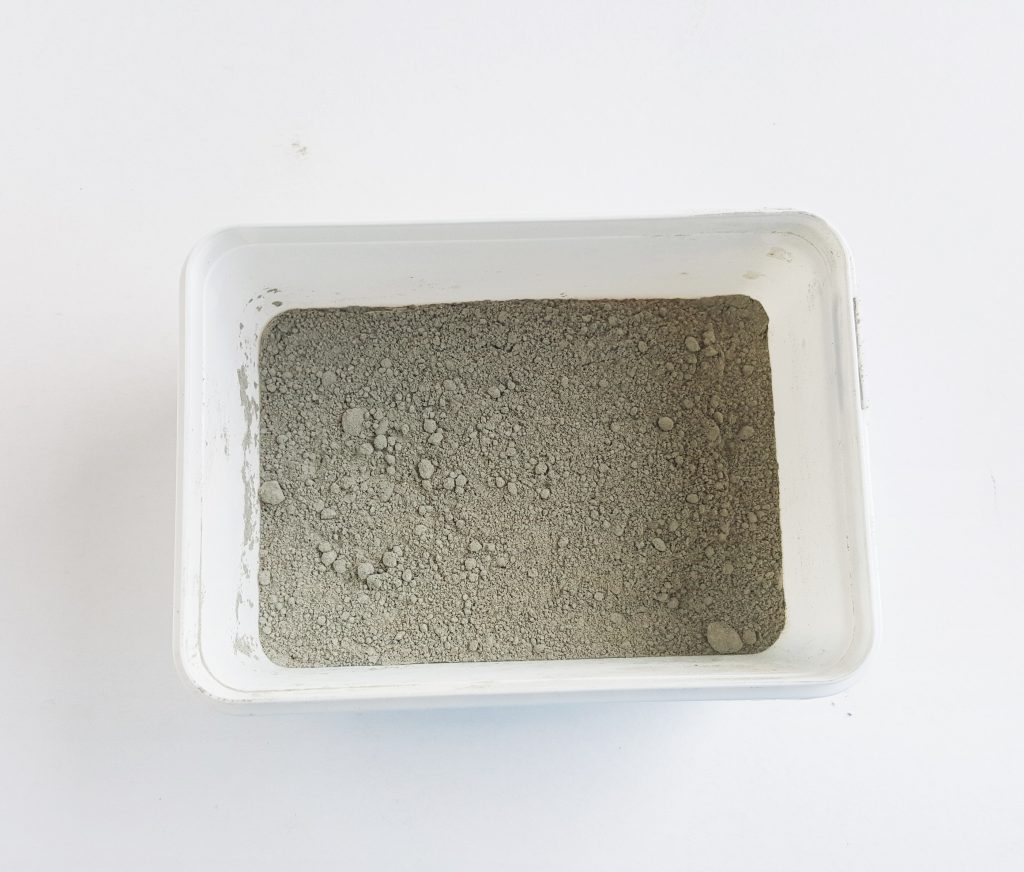
Add water to the cement and sand mixture. The water-cement ratio is also 50:50 but do not add too much water at once and try keeping the mixture thick. Less water means more strength and less time to dry. However, add water little by little until you’re satisfied with thickness. Mix them really well using a stick.

You’re almost finished with your DIY Concrete Planter – keep going!
Pour the cement mixture into the primary container and fill one-third of the container (do not fill the entire container).

Put the secondary container right in the middle of the cement-filled container and push it in gently. Make sure that the secondary container does not touch the bottom of the primary container; there should be at least half an inch gap between the bottoms of both containers.
Allow the cement to dry overnight; Better to wait 24 hours and let it dry entirely.

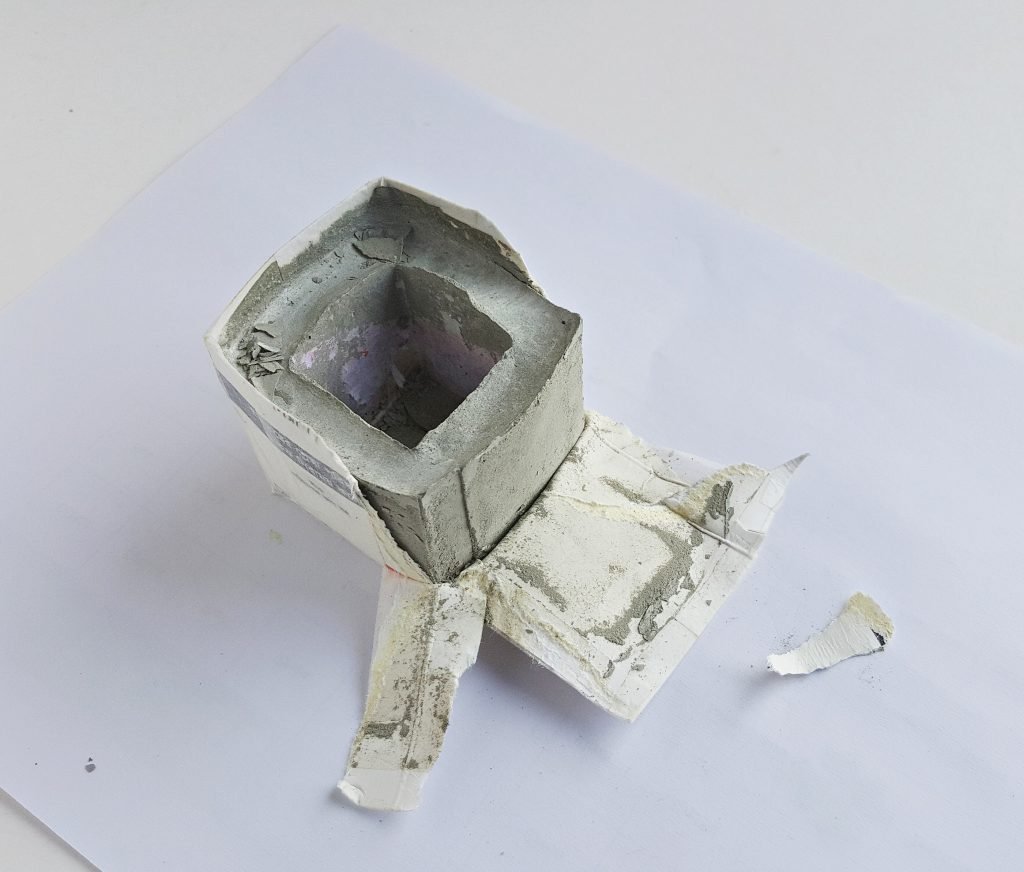
All dry? Now take out the secondary container first. Simply twist, crumble and take it out gently.

Now carefully and nicely remove the primary container. You can use sandpaper or a piece of stone to polish the outer edges of the concrete planters if you want to.
Choose a color for the paint. Use size 4 or 5 paint brush to paint borders or any patterns on the planters. This step is optional; you may also leave the planters with the raw concrete look.
If you paint the planters allow the paint to dry entirely before placing the plants in them.

Leave a Comment